A single photo collage can tell a story, but a collection of them can turn an entire wall into a personal museum of memories. You’ve spent time creating beautiful individual collages, but now comes the real challenge: how do you arrange them together? Creating cohesive collage wall art from multiple prints can feel daunting, but with the right approach, you can transform your space into a stunning, personalized gallery.
Many people hesitate at this stage, worried about making too many nail holes or creating a layout that looks cluttered and chaotic. This guide is here to help. We’ll walk you through simple, effective strategies for arranging multiple collage prints, ensuring your final display is balanced, beautiful, and full of personality.
Planning Your Collage Wall Art Layout
Before you pick up a hammer, a little planning goes a long way. This initial step will save you time and prevent unnecessary holes in your wall. A well-planned layout is the foundation of beautiful collage wall art.
Step 1: Choose a Unifying Theme
The key to arranging multiple collage prints is to find a common thread that ties them all together. This doesn’t mean every collage has to be identical, but they should feel like they belong in the same family. Your theme could be:
- A Consistent Story: Group collages by life events. You could have one for your wedding, another for your travels, and one for your baby’s first year. A wall dedicated to family photo collage ideas can be incredibly powerful.
- A Cohesive Color Palette: Arrange collages that share similar color schemes. For example, you could group prints with cool tones (blues, grays) or warm tones (reds, oranges). Learning how to choose frame colors for your room decor can also help unify the display.
- Matching Print Styles: Use the same collage style across all your prints, such as a minimalist grid or a scrapbook-style layout. This consistency will make the collection feel intentional.
Step 2: Measure Your Space and Your Art
Measure the section of the wall where you plan to hang your collage wall art. Then, measure each of your collage prints. Knowing these dimensions is crucial for planning your layout.
Once you have your measurements, create paper templates for each print by tracing them onto kraft paper or old newspaper. This will allow you to physically test out arrangements on the wall without making any permanent marks.
Arrangement Techniques for Multiple Collages
Now for the fun part: designing the layout. Here are some popular and effective techniques for arranging your collage wall art.
The Grid Layout
A grid is a classic, organized approach that works beautifully with multiple collage prints of the same size.
- How to do it: Arrange your prints in a symmetrical grid, like 2×2 or 3×3. Keep the spacing between each print identical (usually 2-3 inches).
- Why it works: This layout is clean, modern, and timeless. It’s perfect for creating a focal point above a sofa or bed.
- Pro-Tip: Use a level and a measuring tape to ensure your lines are perfectly straight. Even small misalignments are noticeable in a grid. For a truly professional look, you can get inspiration from the best free online photo collage makers for 2025 which often feature perfect grid templates.
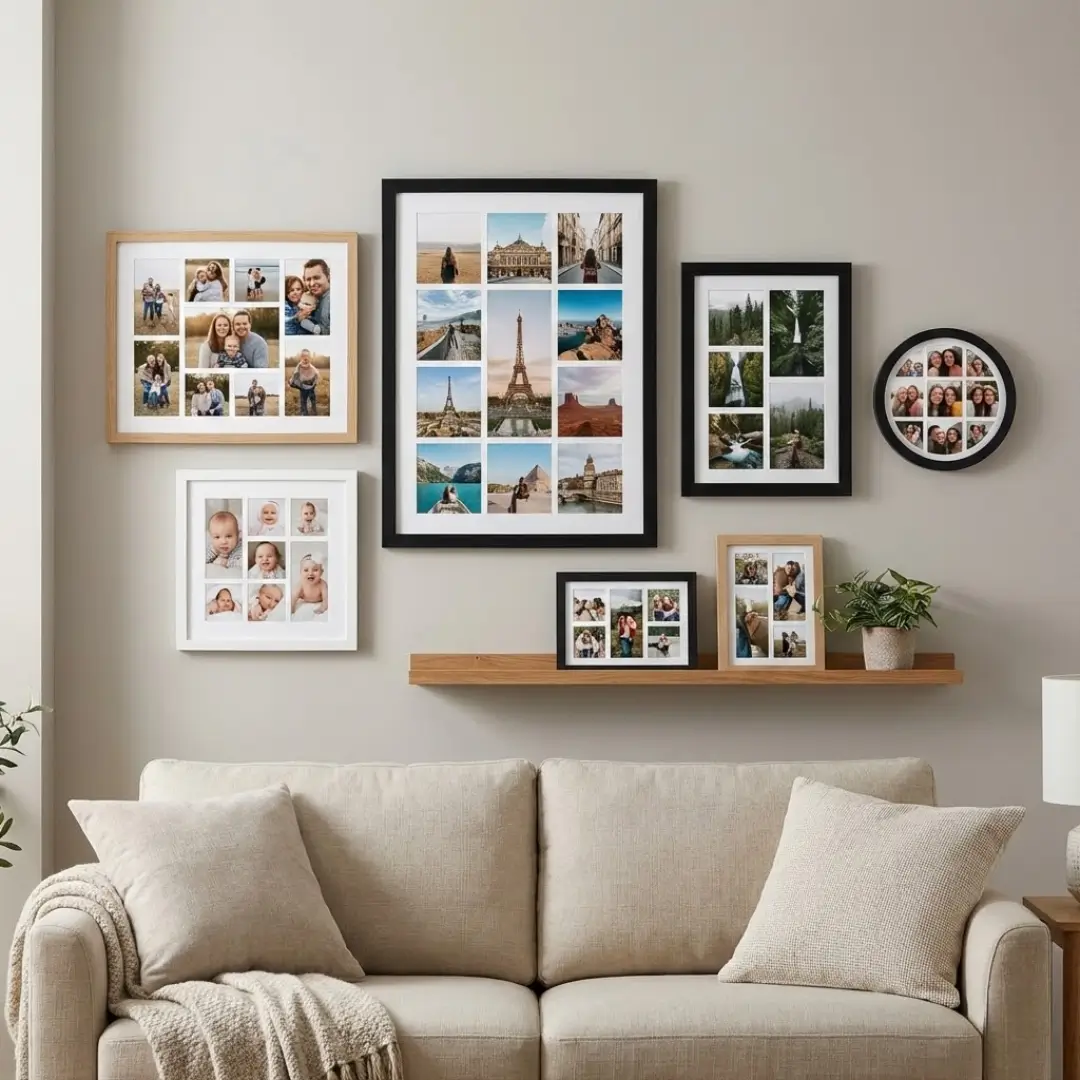
The Organic or “Salon-Style” Layout
This method allows for more creativity and flexibility, as you can mix prints of different sizes and orientations.
- How to do it: Start with your largest collage print as the anchor. Place it slightly off-center. Then, build out from there, adding smaller prints around it. Keep the spacing between frames relatively consistent to maintain a sense of unity. There are great tips on mixing frame sizes and orientations that can help guide you.
- Why it works: This style has a collected, eclectic vibe that adds a lot of personality to a room. It’s ideal for filling large, empty walls or navigating tricky spaces like stairwells.
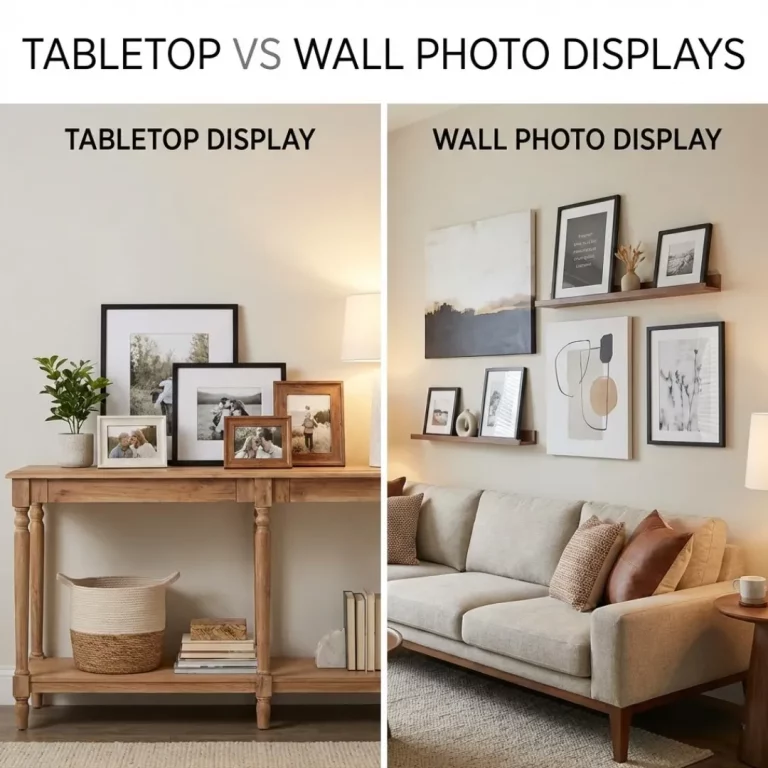
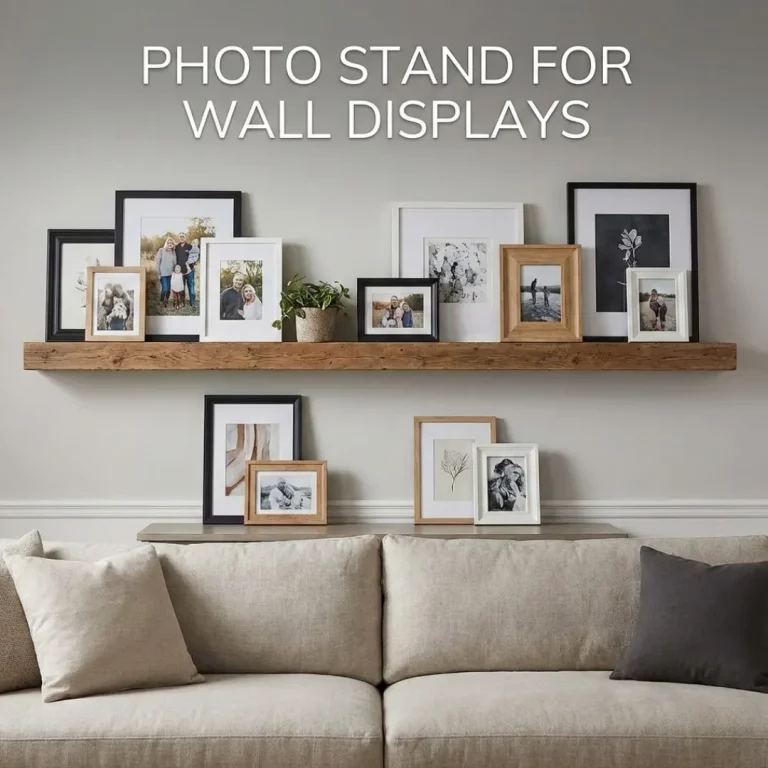
The Linear or Ledge Layout
If you want a less permanent option, displaying your collage wall art on picture ledges is a fantastic choice.
- How to do it: Install one or more picture ledges on your wall. Then, simply lean your framed collage prints on the shelves. You can overlap them slightly and mix in other small decor items.
- Why it works: This is a renter-friendly option that makes it incredibly easy to swap out prints and refresh your display. You can easily switch from a wedding collage to a travel photo collage without any new holes.
Tying It All Together
Once you have a layout, a few final touches can elevate your collage wall art from good to great.
- Frame Consistency: Using the same color or style of frame for all your collage prints is the easiest way to create a cohesive look.
- Print Quality: Ensure all your collages are printed with the same quality. A mix of glossy and matte finishes can look unintentional. When you design a photo collage online, you often have control over the final finish.
- Matting: Deciding between matting vs no matting can impact the overall look. Using mats can give your photos breathing room and create a more formal, gallery-like feel.
Conclusion: Build Your Personal Gallery
Creating collage wall art by arranging multiple prints is a powerful way to fill your home with memories and personality. By choosing a unifying theme, planning your layout with paper templates, and selecting an arrangement style that fits your space, you can confidently build a display that tells your unique story.
Don’t be afraid to experiment. The best arrangements reflect the people who live in the home. So gather your favorite collage prints, start planning, and turn that blank wall into a beautiful testament to your life’s best moments.
Frequently Asked Questions (FAQ)
Q: How far apart should I hang multiple collage prints?
A: A good rule of thumb is to leave 2-3 inches of space between each frame. For larger walls or larger prints, you can increase this to 4-5 inches. The most important thing is to keep the spacing consistent throughout the arrangement.
Q: Should all the frames for my collage wall art match?
A: Matching frames create a very cohesive and polished look, which is a great option for beginners. However, you can mix frame styles and colors if you have a unifying element, such as a consistent color palette within the photos themselves.
Q: How do I arrange collage wall art on a staircase?
A: For a staircase, follow the upward angle of the stairs. Use the bottom stair railing as your guide and arrange the prints so they ascend diagonally. An organic, salon-style layout works very well in this space.
Q: Do I need to create a theme for my collage wall art?
A: While not strictly necessary, a theme helps create a more intentional and visually pleasing display. The theme can be based on events (like a baby photo collage next to a family vacation collage), colors, or even the style of the photography.
Q: Can I mix collage prints with single photo prints?
A: Absolutely! Mixing collage prints with single photos, quotes, or other pieces of art can create a dynamic and interesting gallery wall. Use the larger collage prints as anchor pieces and fill in the gaps with smaller items.
Q: What’s the best way to plan a layout without damaging the wall?
A: The paper template method is best. Cut out paper shapes the size of your frames and tape them to the wall with painter’s tape. This allows you to move things around and perfect your layout before making any holes.
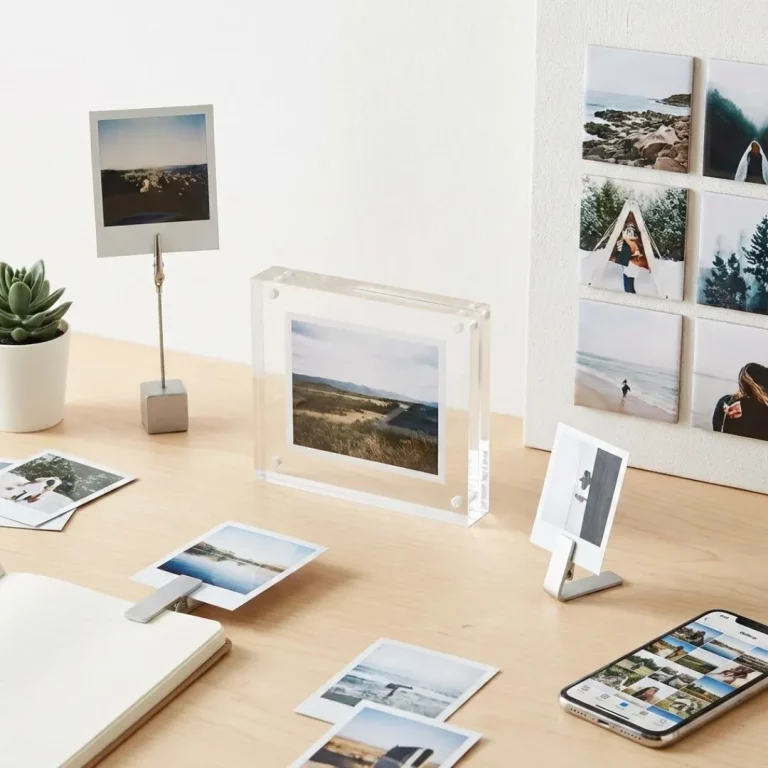
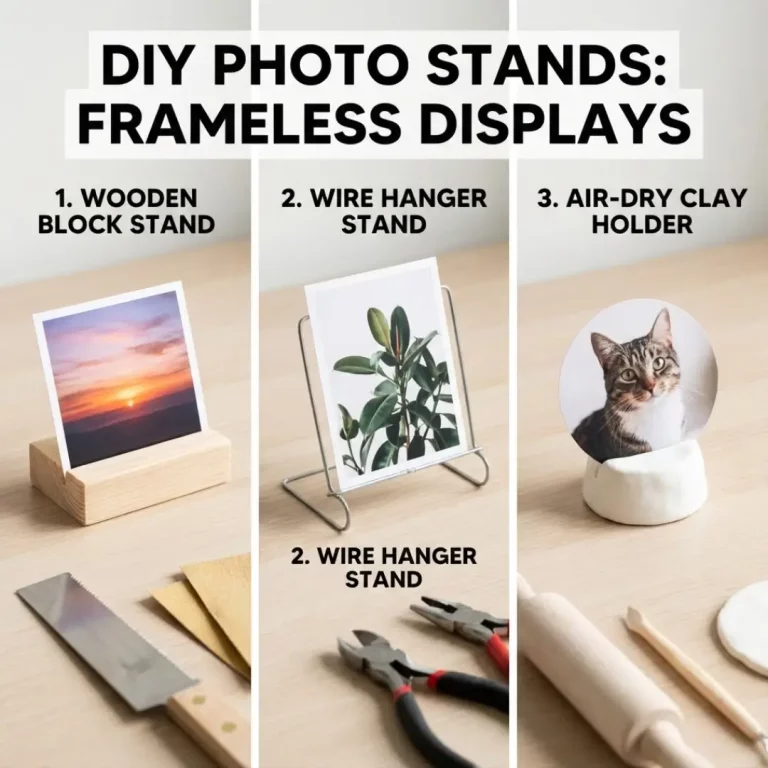
Q: Should my collage prints be in frames or can they be unframed?
A: Both can work! Framed prints offer a classic look. However, modern, unframed options like acrylic or canvas prints can also be arranged together. If using unframed prints, a structured grid layout often looks best to maintain a sense of order. When choosing a frame, consider whether UV-protective glass is necessary to protect your photos.