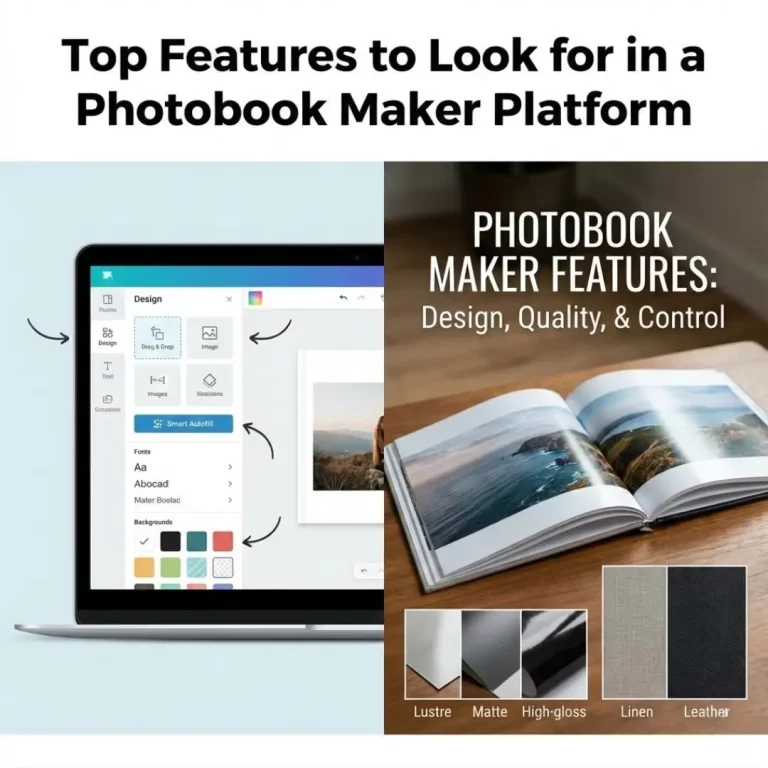
Introduction
We all have thousands of photos sitting on our phones, waiting to be turned into something tangible. But standard photo albums can feel a bit plain. You want your memories to pop with personality, color, and flair. The challenge? Most design software is too complicated, and basic templates are too boring. This is where Canva photobook customization changes the game.
With Canva’s intuitive drag-and-drop interface, you aren’t just placing photos on a page; you are crafting a visual story. From whimsical stickers to textured backgrounds, the creative possibilities are endless. In this guide, we will walk you through exactly how to use Canva’s vast library of elements to transform a simple collection of photos into a professional-looking keepsake that is uniquely yours.
Getting Started with Canva Photobook Customization
Before diving into the fun decorations, you need a solid foundation. Canva makes starting a photobook easy, whether you are a design pro or a complete beginner. The platform offers a specific “Photobook” document type that sets up the correct dimensions for printing.
When you open a new project, you can choose from hundreds of pre-made templates. However, the real magic of Canva photobook customization happens when you start tweaking those templates to match your style. Whether you are documenting a wedding, a baby’s first year, or a road trip, setting up your canvas correctly is the first step toward a stunning result.
Setting Up Your Project
- Search for “Photobook”: In the Canva search bar, type “Photobook” to find the right size templates (usually 8×8 or 8.5×11 inches).
- Upload Your Photos: Go to the “Uploads” tab and drag your selected images into the editor.
- Choose a Base Layout: Pick a template that appeals to you, but remember—everything is changeable.
If you are new to this platform, checking out a Canva photobook tutorial can give you a great overview of the basics before you start adding creative flair.
Elevating Your Design with Canva Backgrounds
The background sets the tone for your entire page. A white background is classic, but Canva photobook customization allows for so much more. You can use colors, textures, gradients, or even photos as your backdrop.
How to Choose the Right Background
- Solid Colors: Use the color picker to match the background to a dominant color in your photos. This creates a cohesive, professional look.
- Textures and Patterns: Search for “paper texture,” “watercolor,” or “geometric pattern” in the “Elements” tab. A subtle texture can add depth without distracting from your images.
- Photo Backgrounds: You can drag a photo to the edge of the canvas to make it a full-page background. Just be sure to lower the transparency so your main photos and text stand out.
Pro-Tip: If you are designing a layflat photobook, consider using a panoramic background that stretches across the entire two-page spread for a dramatic effect.
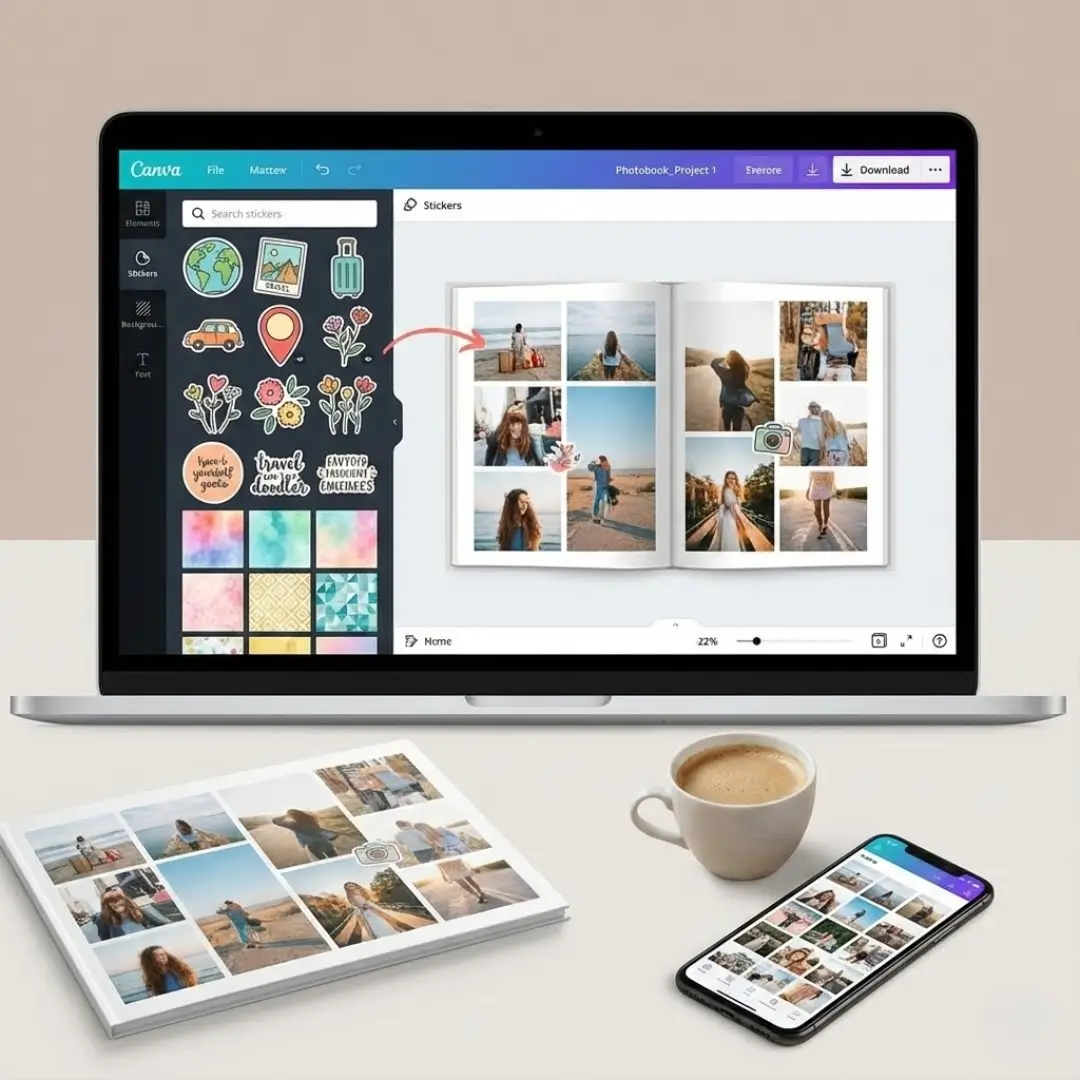
Using Stickers to Add Personality
Stickers are the fun part of Canva photobook customization. They are digital illustrations, icons, and graphics that add context and whimsy to your pages. Canva’s library contains millions of these elements.
Finding the Perfect Stickers
Navigating the “Elements” tab can be overwhelming because there is so much content. Use specific search terms to find exactly what you need.
- For Travel Books: Search for “vintage stamp,” “airplane doodle,” “map pin,” or specific landmarks like “Eiffel Tower illustration.”
- For Family Albums: Look for “hand-drawn heart,” “organic shape,” “family quote,” or “floral corner.”
- For Seasonal Books: Search for “autumn leaves,” “snowflake graphic,” or “summer sun.”
Placement and Styling Tips
- Layering: You can place stickers behind or in front of your photos. Use the “Position” button to arrange layers. Placing a floral element slightly behind a photo corner adds a nice scrapbook feel.
- Transparency: If a sticker is too bold, lower its transparency to make it look like a watermark or a subtle printed detail.
- Consistency: Try to stick to one style of illustration (e.g., all watercolor or all line art) throughout the book. This keeps your design looking cohesive rather than chaotic.
If you enjoy the collage look, you can incorporate these stickers into creative collage ideas to break up the standard grid layout.
Advanced Customization Techniques
Once you master backgrounds and stickers, you can try advanced techniques to make your photobook truly unique.
Frames and Grids
Canva offers “Frames” in the Elements tab. These are shapes that you can drag a photo into.
- Shape Variety: Go beyond rectangles. Use circle frames, ripped paper edges, or even letter-shaped frames to spell out names.
- Polaroid Style: Search for “Polaroid frame” in elements to give your digital photos a retro, instant-film look.
Typography Tricks
Text is a huge part of Canva photobook customization. Don’t just stick to the default fonts.
- Pairing Fonts: Combine a bold sans-serif font for headers with a handwritten script font for captions.
- Text Effects: Use the “Effects” button to add a drop shadow, curve your text, or give it a neon glow.
- Storytelling: Use text boxes to write dates, location names, or short anecdotes. This turns your album into a storytelling photobook that future generations will cherish.
Creating a Theme
A consistent theme ties your book together. You can create a “Brand Kit” in Canva (if you have the Pro version) or simply copy and paste styles from page to page.
| Theme Idea | Background Style | Sticker Style | Font Choice |
|---|---|---|---|
| Modern Minimalist | White or light gray | Simple geometric lines | Clean Sans-Serif |
| Rustic Travel | Kraft paper texture | Vintage stamps & maps | Typewriter style |
| Playful Baby | Pastel polka dots | Cute animals & doodles | Rounded & Bubbly |
For a special occasion like a wedding, ensuring your theme matches the event’s vibe is crucial. You can apply these principles to design a perfect wedding photo book that mirrors your invitation suite.
Finalizing Your Design for Print
After hours of fun Canva photobook customization, it’s time to prepare your masterpiece for printing.
- Proofread: Check every text box for spelling errors.
- Check Margins: Ensure no important faces or text are too close to the edge of the page (the “bleed” area) or the center spine (the “gutter”).
- Download Correctly: Click “Share” > “Download.” Select “PDF Print” for the highest quality.
- Upload to Printer: Take your PDF and upload it to a high-quality printing service like TeoPrint.
If you are unsure about which images made the cut, revisiting how to choose photos for your photobook can help you make those final editing decisions before printing.
Conclusion: Unleash Your Inner Designer
Canva photobook customization empowers you to be the designer of your own memories. By leveraging the platform’s extensive library of stickers, backgrounds, and typography tools, you can move far beyond generic templates. Whether you want a clean, modern look or a busy, colorful scrapbook style, the power is in your hands.
So, stop letting your photos sit in the digital void. Open Canva, pick a background, add a sticker, and start building a keepsake that tells your story exactly the way you want it told.
Frequently Asked Questions (FAQs)
Q: Can I use Canva stickers for a commercially printed photobook?
A: Yes, generally speaking. Canva’s licensing allows you to use their Free and Pro content for personal and commercial designs, including printed photobooks. However, you cannot sell the standalone sticker files themselves.
Q: Is Canva Photobook customization free?
A: Canva offers a robust free version with thousands of free stickers, backgrounds, and fonts. However, many premium elements (marked with a crown icon) require a Canva Pro subscription. You can design a beautiful book using only free elements if you choose carefully.
Q: How do I make sure my background doesn’t clash with my photos?
A: Use the transparency tool. If a background pattern is too busy, lower its opacity to 10-20%. This keeps the texture visible but ensures your photos remain the focal point. Also, sticking to neutral background colors is a safe bet for busy photo spreads.
Q: Can I edit photos directly in Canva?
A: Yes. Canva has built-in photo editing tools. You can adjust brightness, contrast, and saturation. You can also use their AI-powered tools like “Magic Eraser” or “Background Remover” to clean up your images before placing them on the page.
Q: Can I create a layout on one page and copy it to others?
A: Absolutely. This is a great time-saver. Once you design a layout you love with specific stickers and backgrounds, simply click the “Duplicate Page” icon above the canvas. Then, you can swap out the photos and text while keeping the design structure intact.
Q: What is the best file format to download for printing?
A: Always choose “PDF Print.” This format creates a high-resolution file suitable for professional printing. In the download settings, checking “Crop marks and bleed” is also recommended if your printer requires it.
Q: Can I design a photobook cover in Canva?
A: Yes. You can create a custom cover using all the same tools—text, stickers, and photos. Just be sure to check the cover dimensions required by your printing service. For inspiration, look at current [photobook cover design trends](https://blog.teoprint.com