A blank wall holds endless possibilities, but creating a beautiful display can feel like a puzzle. You have cherished photos ready to be shown off, but the thought of arranging them, especially with modern acrylic prints, can be intimidating. How do you achieve that polished, professionally-curated look without endless nail holes and frustration?
Creating a gallery wall is more than just a photo wall hanging project; it’s about telling a story. With the right plan, you can transform your space with a stunning acrylic photo gallery that reflects your style. This guide provides practical layouts and tips to help you arrange your acrylic prints with confidence.
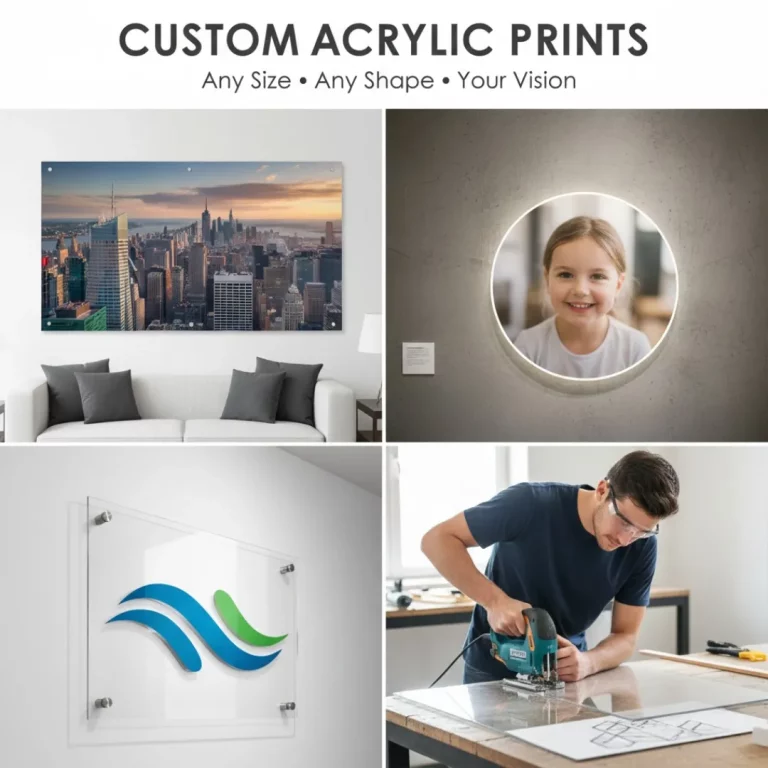
Why Choose Acrylic Prints for Your Gallery Wall?
Before diving into layouts, it’s worth noting why acrylic is a fantastic choice for a gallery wall. Acrylic prints offer a frameless, contemporary look that makes your photos pop with incredible color and depth. Their glossy surface reflects light, adding brightness and a sense of dimension to any room.
This sleek aesthetic allows you to focus on the images themselves, creating a clean and cohesive display. Plus, their durability makes them a long-lasting choice for your most precious memories.
Step 1: Plan Your Photo Wall Hanging Layout
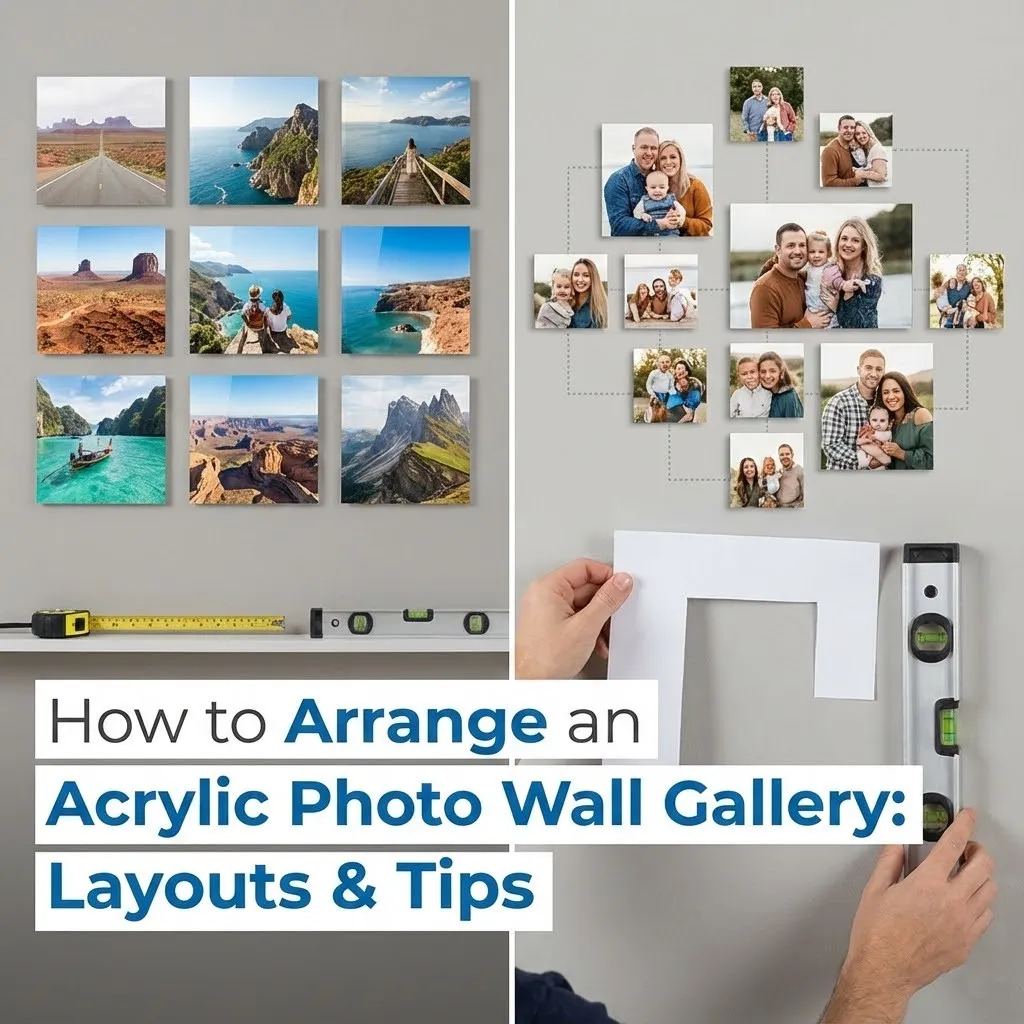
The key to a successful photo wall hanging is planning. Rushing to hang prints without a strategy often leads to crooked lines and a disorganized feel. Take the time to plan your layout on the floor first.
Use painter’s tape or paper cutouts the size of your acrylic prints to map out the arrangement on the wall. This lets you visualize the final look, adjust spacing, and ensure everything is perfectly balanced before you begin drilling. Remember to follow proper frame placement tips by positioning the center of your gallery at eye level (around 57 inches from the floor).
Step 2: Choose a Theme and Color Palette
A cohesive theme ties your gallery wall together. This doesn’t mean every photo must be identical, but they should share a common thread.
- Theme: Your theme could be family portraits, travel adventures, black-and-white photography, or nature landscapes. You could even create a narrative using chronological photo frame wall ideas for storytelling.
- Color Palette: Stick to a consistent color scheme. You can choose all color photos, all black-and-white, or a mix. If mixing, try to ensure the colors complement each other and the room’s decor. Editing your photos with a similar filter can create a unified look.
Step 3: Popular Layouts for Your Acrylic Gallery Wall
The layout you choose will define the personality of your photo wall hanging. Whether you prefer symmetry or a more eclectic style, there’s a layout for you.
The Grid Layout
The grid layout is a classic for a reason. It’s clean, symmetrical, and creates a powerful sense of order. To achieve this look, use acrylic prints of the same size and orientation, and hang them in a perfect grid with equal spacing between each piece. This layout works well for a formal, modern aesthetic.
The Asymmetrical (Salon-Style) Layout
For a more dynamic and playful feel, the asymmetrical layout is a great choice. This style involves mixing various sizes and orientations to create a balanced, yet seemingly random, arrangement. Start with your largest print and build outwards, keeping the spacing between prints relatively consistent to maintain a cohesive look. This approach is perfect for expressing your personality and is a great way of mixing frame sizes and orientations.
The Staircase Layout
A staircase gallery wall is a perfect way to add visual interest to a typically overlooked area. Arrange your acrylic prints to follow the upward angle of the stairs. Use the “step” method, where each print is hung slightly higher than the last, creating a diagonal line that mirrors the staircase.
The Triptych or Multi-Panel Layout
A triptych involves splitting one image across three separate acrylic panels. This creates a dramatic, panoramic effect that is perfect for large-scale landscapes or abstract art. This is a sophisticated photo wall hanging technique that adds an artistic touch, and you can explore more options with 2-photo and 3-photo frame ideas for multi-panel displays.
Step 4: The Hanging Process
Hanging acrylic prints is different from hanging traditional frames. Most acrylic prints use standoff mounting hardware, which creates the signature “floating” effect.
- Mark Your Holes: Once your paper templates are on the wall, use a pencil to mark where the corner holes for the standoffs will go.
- Use a Level: A level is your best friend. Use it to ensure your marks are perfectly aligned, especially for grid layouts.
- Drill and Mount: Drill holes for the standoff barrels, insert wall anchors if needed, and screw the barrels into the wall.
- Hang the Print: Place your acrylic print over the barrels and secure it by screwing on the standoff caps.
Pro-Tip: If reflections are a concern in a bright room, consider using non-glare acrylic frames to reduce reflections for a clearer view of your beautiful photos. This is a simple choice that can greatly elevate your photographic prints.
Tips for a Flawless Finish
- Consistent Spacing: Aim for 2-3 inches of space between each acrylic print for a clean, uncluttered look.
- Start with the Largest Piece: In an asymmetrical layout, hang your largest or most important piece first, slightly off-center, and build around it.
- Think About the Room: Your gallery wall should complement the room, not overwhelm it. For a smaller room, a simple grid or a few larger pieces might work better. In fact, a well-placed display can make decorating small spaces with photo frames or prints highly effective.
- Don’t Be Afraid to Mix Media: While this guide focuses on acrylic, don’t hesitate to mix your acrylic prints with framed art or other wall decor for an eclectic look.
Create Your Perfect Acrylic Gallery Wall
An acrylic photo wall is a stunning way to display your memories and showcase your personality. By planning your layout, choosing a cohesive theme, and using the right photo wall hanging techniques, you can create a display that looks both professional and deeply personal.
Now that you have the tools and inspiration, it’s time to bring your vision to life. Explore our custom acrylic prints today and start building the gallery wall of your dreams.
Frequently Asked Questions (FAQ)
Q: How do I arrange a gallery wall without nails?
A: For a damage-free photo wall hanging, you can use high-quality adhesive strips designed for heavy pictures. Make sure to check the weight capacity of the strips and use enough to securely support each acrylic print.
Q: How far apart should I hang pictures in a gallery wall?
A: A good rule of thumb is to maintain consistent spacing of 2-3 inches between each piece. This creates a cohesive and organized look, preventing the wall from appearing cluttered.
Q: Should a gallery wall be symmetrical?
A: Not necessarily. A symmetrical grid layout offers a formal and modern look, while an asymmetrical (salon-style) layout provides a more eclectic and personal feel. The choice depends on your personal style and the room’s decor.
Q: What is the 57-inch rule for hanging pictures?
A: The 57-inch rule is a guideline used by art galleries. It suggests that the center of a single artwork or the center of a gallery wall grouping should be 57 inches from the floor. This places the art at the average human eye level for optimal viewing.
Q: Can I mix different sizes of acrylic prints?
A: Yes, absolutely! Mixing different sizes and orientations is key to creating a dynamic and visually interesting asymmetrical or salon-style gallery wall. Start with your largest piece as an anchor and arrange smaller ones around it.