Custom framing can transform a favorite photo into a display-worthy masterpiece, but the cost of professional framing often deters many. One of the most important elements of a polished frame is the mat board. A mat not only highlights your image but also adds space around it, creating visual interest and protecting it from direct contact with the glass. While pre-cut mats are available, they often come in standard sizes that don’t always fit your unique frame or artwork. Fortunately, with the right tools and a bit of patience, you can cut your own custom mat board and achieve a gallery-quality look at home.
Learning how to do DIY photo matting introduces endless creative options. Not only does it allow you to save on framing costs—especially for multiple pieces—but it gives you total control over the color, design, and size of your mat. This detailed guide will take you through each step, from gathering tools to making your final cut, so that you can achieve beautiful, professional results for all your photos.
Why DIY Photo Matting is Worth It
Before getting started, consider the many benefits of cutting your own mats:
- Save Money: Professional matting and framing services can add up. Purchasing full sheets of mat board and cutting them yourself can cut the cost per frame significantly.
- Full Customization: Standard mats come in set sizes, but with DIY, you have total control over border widths and window openings—even for creative multi-photo displays.
- Fit Any Frame: Achieve a perfect fit, even for vintage or non-standard frames, by customizing the outer and window dimensions of your mat.
Looking for more ways to display multiple photos? Check out 15 Inspiring Collage Frame Ideas for Your Cherished Photos to discover creative matting and framing approaches.
Step 1: Gather Essential Tools and Materials
For professional-looking results, the right tools are essential. Although a craft knife can work in a pinch, a dedicated mat cutter is worth the investment for cleaner, more accurate cuts.
Recommended Tools:
- Mat Cutter: Look for a system with a cutting rail and a bevel cutter. Brands like Logan are beginner-friendly and reliable, and a bevel cutter creates that classic, slanted edge.
- Self-Healing Cutting Mat: Ensures your work surface stays intact and helps preserve blade sharpness.
- Metal Ruler with Non-Slip Back: Guarantees straight, accurate cuts and prevents shifting.
- Pencil: A sharp, hard-leaded pencil (2H is ideal) makes precise marks that erase cleanly.
- Art Eraser: Use a soft eraser to remove pencil marks without damaging your mat.
- Utility Knife or Box Cutter: Handy for sizing the full mat board before you cut the window.
Materials:
- Mat Board: Always use acid-free, archival-quality board to prevent yellowing (“mat burn”) on your artwork over time.
- Your Photo and Frame: Have both on hand to take accurate measurements.
Want to elevate the look of your finished frame? Discover Design Guide for Beautiful Frames: Tips and Tricks for expert advice on complementary frame and matting designs.
Step 2: Measure and Mark with Accuracy
Precision is key to a professional result. As the saying goes: “Measure twice, cut once.”
A. Measure Frame Opening
Measure the inside of your frame’s rabbet (the inner lip where the mat will sit), both height and width. This determines your mat’s outer size.
B. Decide Border Widths
- Equal Borders: Choose the same width (e.g., 2″ on each side) for an even, classic frame.
- Weighted Bottom: Add extra width to the bottom border (e.g., 2.5″ bottom, 2″ elsewhere) for a traditional, visually grounded effect.
For more border inspiration, visit A Guide to Photo Frame Thickness and Border Width.
C. Calculate the Window Opening
The mat window should be slightly smaller than your artwork to hold it in place. A 1/4” overlap on each side is typical.
- Measure your photo precisely.
- Subtract ½ inch total from both the height and width (1/4” on each side). For instance, an 8×10 photo would need a window of 7.5” x 9.5”.
D. Mark on Back of Mat Board
Do all measuring and marking on the reverse side to keep the front clean.
- Cut the mat board to the outer size using your utility knife and ruler.
- Mark equal borders (or your chosen layout) to frame the window.
- Double-check that your window opening matches the intended size for a seamless fit.
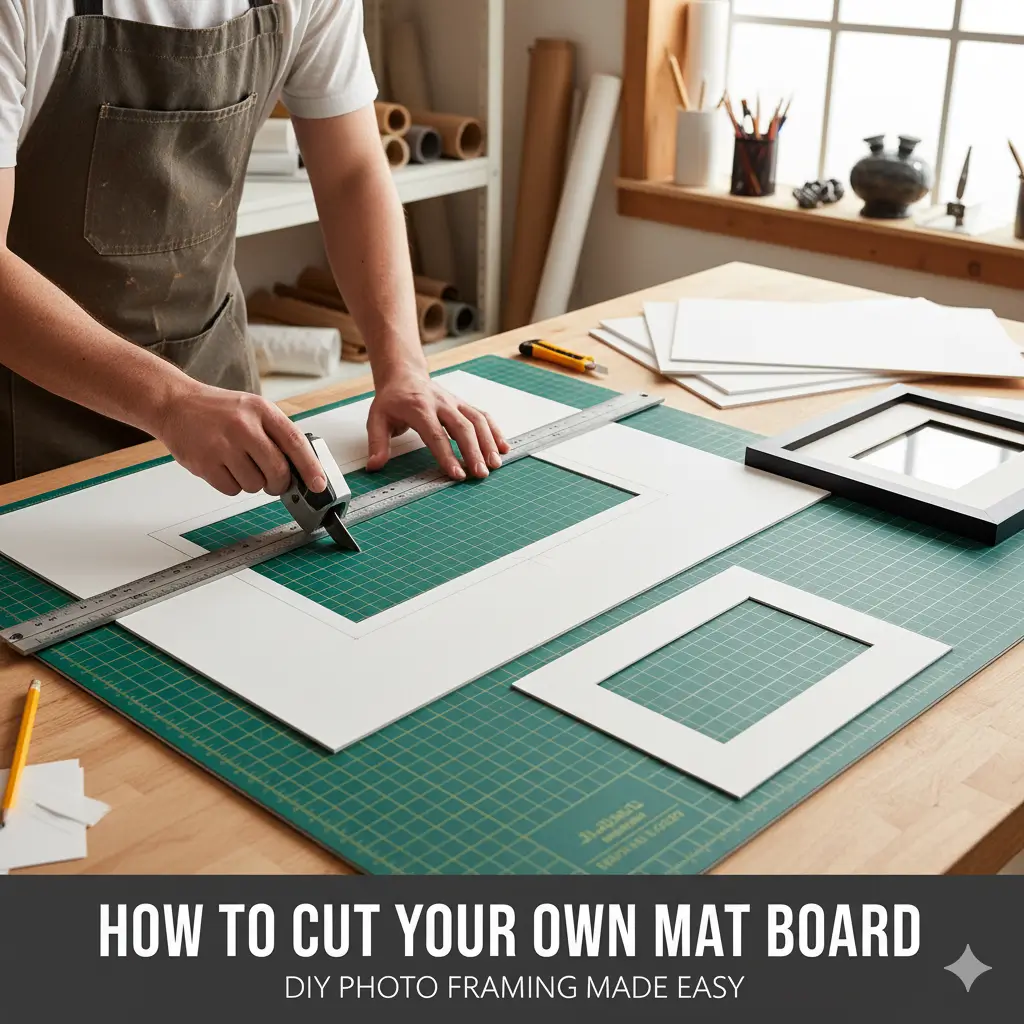
Step 3: Cutting the Beveled Mat Window
This step requires a steady hand and a sharp blade.
- Secure Setup: Use your cutting mat to protect your surface. Secure the mat board and guide rail along your pencil lines.
- Align the Cutter: Position the bevel cutter exactly on your pencil mark.
- Begin Cutting: Press the blade down, then—without lifting—slide it smoothly along the rail to the next marked corner. Avoid jagged edges by cutting in one motion.
- Precision Matters: Stop precisely at the corner; avoid cutting past lines to prevent overcuts.
- Repeat and Remove: Rotate the board for each side. After all four cuts, gently pop out the mat window.
For added versatility, explore professional multi-opening or collage layouts with How to Arrange Multiple Frames for Stunning Collage Photo Displays.
Step 4: Assemble and Display
With your custom mat ready, you can now mount your art and reassemble the frame.
- Mount Your Artwork: Place the mat face down. Align the photo with the window opening, and attach using acid-free tape—taping just the top edge to allow natural expansion.
- Clean Glazing: Thoroughly clean both sides of your glass or acrylic.
- Finish Assembly: Layer the glass, matted photo, and backing board in your frame, then close it up securely.
For ideas on frame placement and gallery wall setups, see How to Create a Stunning Gallery Wall in Your Home.
Troubleshooting and Pro Tips
- Ragged Edges: Change your blade frequently to ensure clean cuts.
- Corner Overcuts: Practice stopping right on the penciled corner lines.
- Curved Cuts: Use a non-slip ruler and always cut along a stable guide rail.
Cutting your own photo mats is a practical and rewarding way to enhance your home gallery and ensure every framed piece fits perfectly. With practice, you’ll unlock full creative control over your framing projects. Gather your supplies, take your time through each step, and see how your DIY matting skills transform your favorite photos into true works of art.