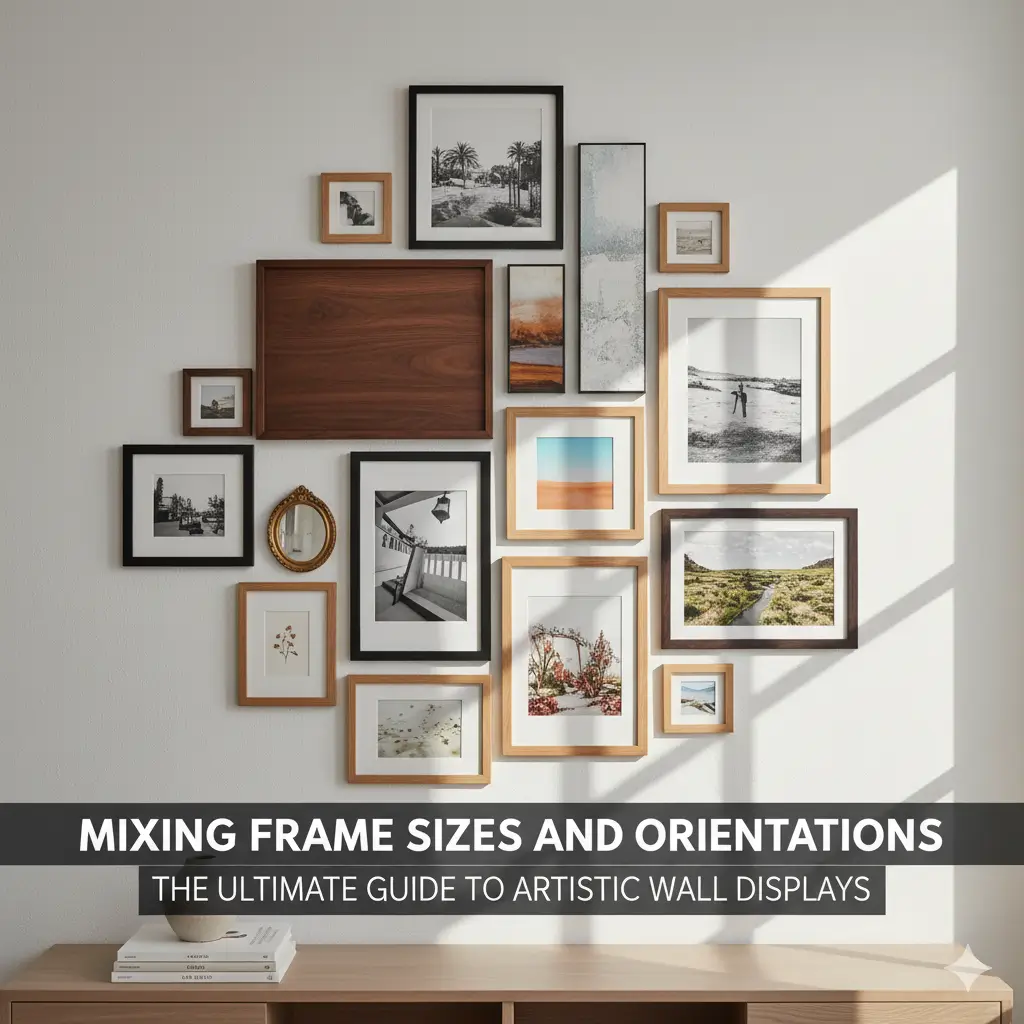
Creating a classic wall of perfectly aligned frames has its charm, but your space can be truly transformed when you embrace variety. Mixing frame sizes and orientations—combining vertical, horizontal, and square frames—can turn a plain wall into a vibrant, gallery-worthy feature that reflects your personal story. Knowing how to achieve this look is easier than you think, especially when you follow expert-backed steps optimized for both beauty and balance.
If planning a free-form gallery wall feels overwhelming, know that success comes from blending creativity with some simple design rules. With the strategies below, you’ll have the confidence to design a dynamic display that draws attention and brings your memories—and your style—to life.
Why Mix Frame Sizes and Orientations?
Moving beyond uniform frames introduces energy and depth to your decor. Here’s what makes a mixed-frame layout so compelling:
- Visual Interest: Different sizes and shapes guide the eye across your wall, letting each photo or artwork stand out while still belonging to a unified whole. It’s far more engaging than a rigid, repetitive grid.
- Versatility: Not every photo suits the same orientation or size. Whether you have panoramic landscapes or intimate vertical portraits, choosing the right frame size helps you highlight each piece at its best.
- Storytelling: Larger frames can serve as the stars—think family portraits or statement art—while smaller frames add supporting moments. This layering brings your personal narrative into sharper focus.
Building a Cohesive Foundation
A harmonious gallery wall doesn’t happen by accident. The secret is to identify a common thread that ties your display together:
Unified by Color: Selecting frames in a single color—whether sleek black, crisp white, or bold gold—instantly brings harmony. Your mix of sizes and photos becomes the star against a consistent visual foundation.
Unified by Style or Material: You can create a connection by picking frames with a similar style or made from the same material. Natural wood in varying tones or contemporary metals can link an eclectic array of designs. Need inspiration? Explore 12 creative photo frame designs or the latest wall print design trends.
Unified by Theme: Sometimes, it’s the art that brings unity. A wall of black-and-white travel photography, family milestones, or artwork from a single artist makes your frames feel curated, regardless of their shapes and sizes. For more ideas on creating a story-rich display, check out DIY photo wall ideas.
Step-by-Step Layout Guide
Once you’ve chosen your cohesive element, bringing your vision to life is all about planning:
1. Start with an Anchor Piece
Choose a central or most significant item to act as your anchor. This could be your largest frame or your most meaningful photo. Offset it from the exact center to create a dynamic focal point that avoids a too-orderly look. For positioning tips, read our guide to hanging frames.
2. Arrange Frames on the Floor
Lay out your frames on the floor, using an area that mirrors your wall space. Place your anchor first, then build around it. Balance different sizes by distributing them evenly. Don’t put all the large frames together—spread them to maintain a visually pleasing weight.
Keep the spacing between each frame uniform, ideally 2–3 inches. For pro-level guidance, see arrange multiple frames for collage photo displays.
3. Use Paper Templates
Trace the outline of each frame on kraft or wrapping paper, then cut these templates out. Mark the nail or hook spot and tape the templates to the wall in your planned layout. This gives you a true-to-size preview before you commit.
4. Adjust and Perfect Your Layout
Step back and live with your paper templates for a day or two. Rearranging paper is simple and lets you fine-tune the overall flow before making any holes. Switch frames or tweak positions until you love the arrangement.
5. Hang with Precision
When you’re happy with the look, hammer nails through the marked spots on the paper, tear away the template, and hang your frames. Use a level to keep everything straight for a polished finish.
Creative Layout Ideas for Mixing Frames
Ready to design? Try these inspiring concepts:
- Organic Cluster: Place your anchor, then expand outward in all directions. Ideal for filling empty walls, this layout is flexible and eye-catching.
- Staircase Gallery: Follow the angle of your staircase, letting frames progress diagonally along the wall—a classic, flowing effect for hallways.
- Aligned Edge: For a modern twist, align all frames along the top or bottom to establish order, then allow the variety above or below to bring character.
You can also master multi-photo frame arrangements for an intriguing gallery wall.
Make Your Wall a Work of Art
Mixing frame sizes and orientations elevates your decor, turning photos, art, and treasured mementos into a unified masterpiece. Begin by choosing a cohesive thread, plan with care, and allow your display to evolve as you make final adjustments. Remember that your wall is a canvas—express your creativity, and don’t hesitate to bring in new pieces over time.
Ready for more gallery wall inspiration? Explore how to arrange a wall painting set for maximum impact or get the most from your display with creative wall frame ideas.


