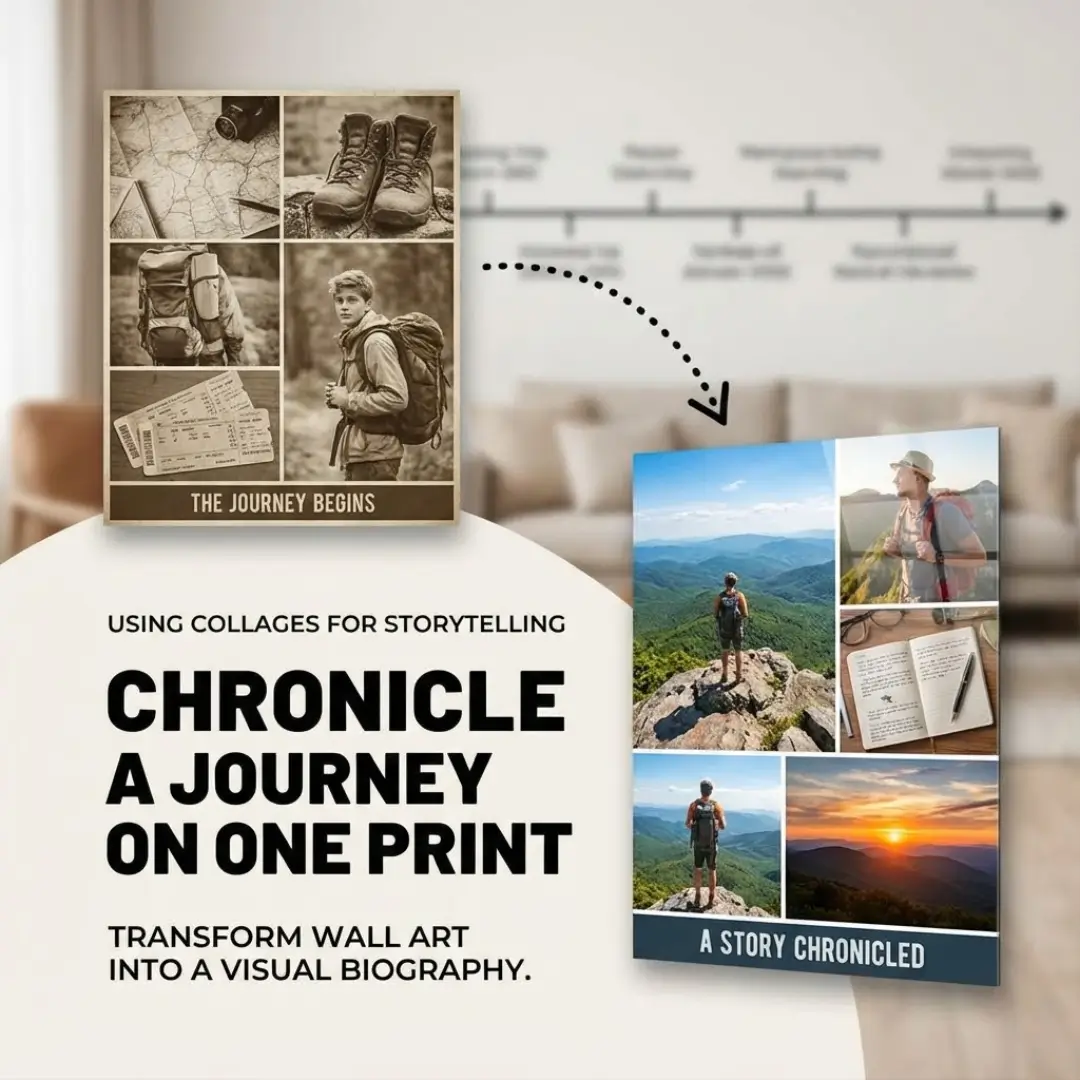
We’ve all heard the saying that a picture paints a thousand words. But what happens when you combine five, ten, or twenty pictures onto a single canvas? You get more than just a gallery; you get a narrative. While a single photograph captures a split second in time, a collection of images can span years, cover thousands of miles, or document a complete transformation.
This is the power of photo collage storytelling. It transforms a static piece of wall art into a dynamic visual biography. Whether you want to document a backpacking trip across Europe, your child’s first year of life, or the restoration of a classic car, a collage allows you to see the entire arc of the journey at a single glance.
If you have a hard drive full of memories but aren’t sure how to display them meaningfully, this guide is for you. We will explore how to select, arrange, and print your photos to tell a compelling story without saying a word.
The Art of Photo Collage Storytelling
Photo collage storytelling is about more than just grouping pretty pictures together. It is about curation and flow. It requires you to think like a film director or a book editor. You aren’t just decorating a wall; you are chronicling a journey.
Unlike a photo book where you turn pages to reveal the plot, a collage presents the beginning, middle, and end simultaneously. This unique format allows the viewer to make connections between different moments instantly. They can see the nervous excitement at the start of a wedding day right next to the exhausted joy on the dance floor at the end of the night.
Why Choose a Storytelling Collage?
- Immediate Impact: You see the full scope of the event or journey instantly.
- Space Saving: It replaces the need for dozens of individual frames.
- Conversation Starter: Guests will naturally gravitate toward the details, asking questions about specific photos.
- Emotional Connection: Seeing the progression of time or travel evokes stronger nostalgia.
Steps to Chronicle Your Journey
Creating a narrative collage requires a bit of planning. You can’t just throw random photos into a grid and hope for the best. Follow these steps to build a cohesive visual story.
1. Define Your Narrative Arc
Every good story has a theme. Before you select a single photo, decide what story you are telling. Is it a chronological timeline? A “day in the life”? A study of a specific relationship?
Common Narrative Themes:
- The Travellog: From the airport departure board to the final sunset on the beach.
- The Milestone: A baby’s growth month-by-month for their first year.
- The Event: A wedding, graduation, or reunion from start to finish.
- The Transformation: A home renovation “before and after” or a fitness journey.
If you are looking for specific concepts, check out these creative photo collage ideas to spark your imagination beyond standard grids.
2. Curation: Selecting the Right Moments
This is the hardest part. You likely have hundreds of photos, but a photo collage storytelling piece works best with a curated selection. Less is often more.
Aim for a mix of “hero shots” (the big, stunning images) and “detail shots” (close-ups of hands, tickets, food, or textures). This variety adds depth. For example, if you are chronicling a road trip, don’t just use landscapes. Include a shot of the packed trunk, the map, and the funny selfie at the gas station.
If your photos are scattered across devices, start by learning how to organize digital photos for printing. This will make the selection process much less overwhelming.
3. Arrange for Flow
How you place the photos determines how the viewer reads the story. Western audiences typically scan from top-left to bottom-right.
- Chronological Order: Place the beginning of the journey at the top left and the end at the bottom right.
- Center-Out: Place the most important “hero” image in the center and arrange supporting details around it.
- Thematic Grouping: Group photos by color or activity rather than time.
For detailed advice on layouts, our guide on chronological photo frame wall ideas offers excellent tips on arranging images to show the passage of time.
Design Techniques for Better Storytelling
To elevate your photo collage storytelling, use design elements that guide the eye and add context.
Use of Color
Color evokes mood. A black-and-white collage feels timeless and documentary-style, perfect for weddings or heritage photos. A vibrant, high-saturation collage feels energetic, ideal for travel or birthday parties. Ensure your photos share a similar color grading so the collage looks cohesive, not chaotic.
Adding Text Captions
Sometimes, a story needs words. Adding a date, a location, or a quote can ground the images in reality. If you are chronicling a specific event, a simple header like “The Smith Family Reunion – 2024” adds instant context.
Be careful not to clutter the design. If you are unsure about typography, read our post on creative photo frame with message ideas for inspiration on adding meaningful text.
The Power of Negative Space
Don’t fear the gap. Leaving white space (borders) between photos allows the eye to rest and prevents the story from becoming overwhelming. It creates a clean, gallery-like aesthetic that makes each individual photo pop.
Best Formats for Storytelling Prints
Once you have designed your digital masterpiece, you need to bring it into the physical world. The material you choose affects how the story is perceived.
Acrylic Prints
Acrylic is modern, sleek, and high-definition. It makes colors vibrant and sharp. This is the best choice for high-energy stories like travel adventures, sports, or vibrant celebrations. The depth of the acrylic glass draws the viewer in. Learn more about how to create a stunning photo collage for acrylic printing to get the best results.
Canvas Prints
Canvas adds texture and warmth. It feels more “artistic” and traditional. This is excellent for softer stories, like baby photos, weddings, or family heritage collages. It gives the piece a painterly quality.
Framed Prints
A classic choice. Printing on matte paper and placing it in a frame adds a level of formality. This works well for official timelines, professional portfolios, or formal family histories.
For a deeper dive into materials, compare your options with our guide on acrylic wall art vs canvas.
Example: The “Year in Review” Collage
One of the most popular forms of photo collage storytelling is the “Year in Review.” Instead of letting your photos disappear into a social media feed, select one favorite photo from each month of the year.
Layout Idea:
- Create a 3×4 grid (12 photos total).
- Label each photo with the month, or just the year at the bottom.
- Mix major milestones (holidays, birthdays) with quiet everyday moments.
This creates a powerful visual diary of your year that serves as a beautiful reminder of how much life happened in 365 days. It’s similar to the concept of a year in review photobook, but displayed openly on your wall.
Conclusion
Photo collage storytelling is a powerful way to preserve your legacy. It takes fleeting digital moments and cements them into a tangible narrative. By carefully selecting your images, arranging them with intent, and printing them on high-quality materials, you create more than just decor—you create a conversation piece that honors your journey.
Whether it’s the story of a vacation, a relationship, or a life well-lived, your memories deserve to be seen together. Don’t let them sit hidden in a cloud folder. Bring them together and let them tell their story.
Ready to start your own project? You can use simple tools to design a photo collage online and see your narrative come to life.
Frequently Asked Questions (FAQ)
Q: How many photos should I include in a storytelling collage?
A: It depends on the size of the print. For a standard 16×20 inch print, 9 to 12 photos usually offer a good balance of detail and storytelling. If you have 20+ photos, consider a larger print size or a “mosaic” style where images are smaller.
Q: What is the best way to tell a story if my photos are not chronological?
A: Focus on themes or colors. Group photos by activity (e.g., “hiking,” “swimming,” “eating”) or match them by dominant colors (e.g., all blue photos together). This creates a visual rhythm that is just as compelling as a timeline.
Q: Can I mix horizontal and vertical photos?
A: Yes! This creates a dynamic, “puzzle-style” layout. However, it can be trickier to align. Using an automatic collage maker tool can help you fit different orientations together seamlessly without cropping important details.
Q: Should I edit my photos before putting them in a collage?
A: Yes. At a minimum, try to ensure the brightness and contrast are consistent across all photos. You don’t want one dark, moody photo next to a bright, blown-out one, as it will distract the eye. Applying a subtle, consistent filter to all images can help tie the story together.
Q: What if I have low-resolution photos mixed with high-res ones?
A: Use the low-resolution photos (like those from social media) for the smaller spots in the collage, and save the high-resolution camera photos for the larger “hero” spots. Check out our guide on collage print resolution for more tips on ensuring sharpness.
Q: Is a collage better than a photobook for storytelling?
A: They serve different purposes. A collage is for display—it’s a highlight reel you see every day. A photobook allows for a deeper dive with hundreds of photos and extensive text. For a comprehensive comparison, read photo collage frame vs photo book: which to choose.