Travel has a unique way of creating unforgettable moments. From awe-inspiring sceneries to candid experiences with loved ones, every trip is a treasure trove of memories worth preserving. But how can you turn these memories into a visually captivating and personal narrative? Enter the world of travel photo books, where creativity meets storytelling.
Designing a travel photo book comes with challenges, though. How do you organize hundreds of photos? How do you incorporate mementos or tell a cohesive story? If you’re struggling to get started, or you’re unsure how to design a travel photo book that truly captures your adventures, this guide is for you.
By the end of this article, you’ll discover 11 expert-backed tips on travel photo book design. You’ll learn how to organize photos, design layouts, incorporate interaction, and, most importantly, create a keepsake that tells your unique travel story.
The Benefits of Creating a Travel Photo Book
A Tangible Memory Keeper
A digital gallery feels fleeting, but printed photo books are forever. A well-designed travel photo book lets you physically hold your memories and relive moments as you flip through the pages.
A Personal Storytelling Tool
Unlike a digital album, a photo book allows you to interweave text, mementos, and unique layouts that narrate your adventures in a deeply personal way. Whether you create sections for cities visited or specific activities, each page can tell a new chapter.
A Connection Builder
Travel photo books make perfect conversation starters. Whether you’re showcasing your trips to friends, guests, or even clients, they allow for shared storytelling experiences and connections.
Highlights for Future Trips
Your photo book also becomes a resource for future journeys. Detailed itineraries, restaurant tips, or hidden gems from your past trips can serve as inspiration for your next adventure.
Tips for Organizing Travel Photos
Declutter Your Camera Roll
Before designing your photo book, tackle your photos. This may seem daunting if you’re dealing with hundreds of images, but here are a few ideas to streamline the process:
- Group photos by date, location, or theme.
- Create folders for must-have categories, like landmarks, nature shots, and food photography.
- Eliminate blurry images, duplicates, or low-quality snaps.
Select Quality Over Quantity
Less is always more in travel photo book design. Choose high-resolution photos that evoke emotion or tell a story. A single striking photo of a sunset can sometimes say more than an overcrowded collage of blurry skyline images.
Consider Photo Editing
Editing can elevate even the simplest photos. Use basic tools like Canva or Lightroom to adjust brightness, enhance colors, or crop for better composition. Keep edits consistent for a cohesive book aesthetic.
Pro Tip: Save edited photos in separate folders to distinguish them from your originals.
Creative Layout Ideas for Travel Photobooks
Play with Themes and Colors
A strong theme turns random photos into a cohesive album. If your travel destination boasts rich cultural colors (like Morocco’s earthy tones or the blues of Santorini), reflect these shades in your page designs.
Experiment with styles like minimalism, vintage scrapbooks, or modern grid layouts. For instance:
- Minimalist layouts pair well with bold, statement photos and detailed captions.
- Vintage scrapbook layouts are great for including additional mementos like scanned postcards or maps.
Integrate Chronological Sections
A day-by-day progression helps relive travel experiences vividly. However, breaking away from linear storytelling by grouping pages by activity (e.g., “Street Markets” or “Beach Adventures”) also sparks intrigue.
Use White Space to Highlight Images
Pages overloaded with pictures can feel chaotic. Create clean layouts by balancing photos with adequate white space. For two-page spreads of sprawling landscapes, opt for one or two dominant images per page, adding captions in a subtle corner.
Experiment with Overlays and Layers
Layer text over stunning images, such as placing short anecdotes over soft-focus backgrounds. This works well for photos with negative space or a washed-out tone that doesn’t overpower text readability.
How to Incorporate Mementos and Interactive Elements
Adding Personal Touches
Memorabilia breathes life into photo books. Incorporate scanned ticket stubs, restaurant menus, handwritten notes, or even pressed flowers from your trip. Use these items as page accents, backgrounds, or dividers between sections.
Idea: Create a “Memory Box” spread, dedicating a page entirely to small mementos from your trip.
Leverage QR Codes for Extra Interaction
Want to make your travel photobook interactive? Add QR codes that link to videos, digital journals, or online photo galleries. This tech-forward addition allows anyone flipping through your photobook to relive dynamic memories, like your skydiving adventure.
Pro Tip: Use Platforms like eAlbum offers free QR code in Photobook.
Include Personalized Maps
Add maps of the destinations you visited, with routes or highlights marked in ways that reflect your travel itinerary. Designing custom maps through apps like Canva adds depth to the narrative.
Pro Tip: For a DIY touch, overlay handwritten annotations on the maps, providing a guide to landmarks or hidden locations.
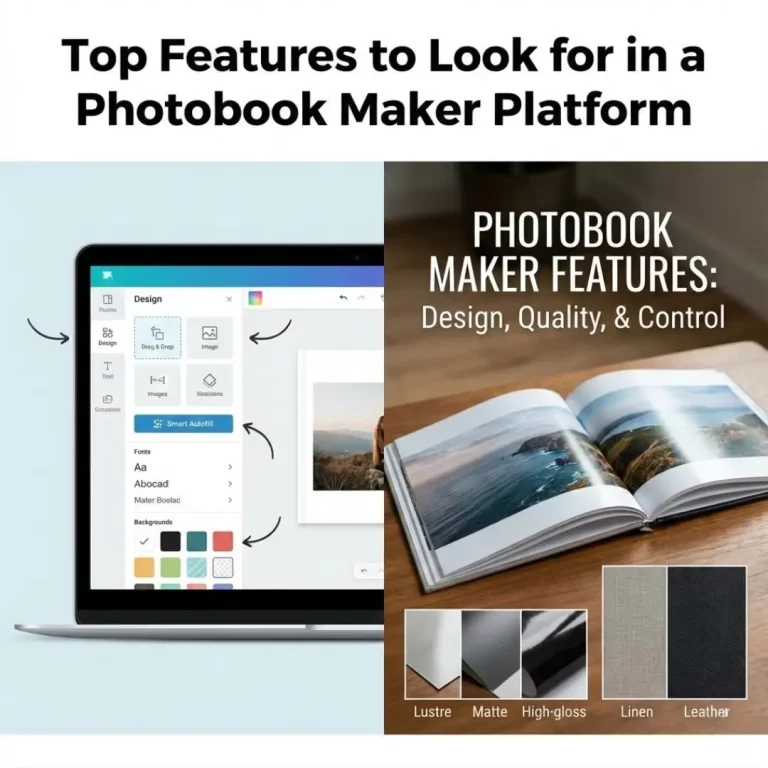
Essential Tools for Travel Photo Book Design
Canva
One of the most beginner-friendly tools, Canva offers drag-and-drop layouts, diverse templates, and tools for adding text or graphics. Their color-matching feature ensures your designs have visual harmony.
TeoPrint
A favorite for travel photo book design, TeoPrint provides pre-designed travel themes alongside custom features. Their Ai options allow you to edit photos with Ai.
MyWebAR
For innovative projects, MyWebAR helps integrate Augmented Reality (AR) into photobooks. From displaying animations to linking live location footage, it’s a powerful tool for creating interactive experiences.
Adobe Lightroom
For photo editing, Lightroom offers advanced options for everything from color calibration to spot corrections. Its presets simplify bulk editing, ensuring consistent photo quality.
Pro Tip: Test different platforms to find the one that aligns best with your desired creative level.
Common Mistakes to Avoid in Travel Photo Book Design
Overcrowding Images
Jamming too many photos onto a single page diminishes the story’s quality. Instead, focus on layouts that give your images room to breathe and stand out.
Skipping Captions
Photos are powerful, but their stories often require context. Don’t skip captions—even short phrases or dates can make the book more meaningful.
Ignoring Paper Quality
Your photo book’s quality is as much about material as its design. Opt for premium or lay-flat pages to elevate the presentation and ensure photos shine.
Forgetting Backups
Always backup photos before beginning the design process. Unforeseen technical issues, like crashes or accidental deletions, can ruin hours of hard work.
Actionable Insights for Travel Photo Book Design
- Start Small: If creating a full travel photobook feels overwhelming, try designing a smaller trip recap (e.g., a weekend getaway) as a test run.
- Storyboarding Saves Time: Plan your photo book’s layout and content in advance using rough sketches or tools like Milanote.
- Use Presets for Consistency: Tools like Canva and Mixbook offer design presets that help maintain stylistic consistency across pages.
- Personalize Fonts and Colors: Use custom fonts and colors that reflect your trip’s vibe. For example, earthy or pastel tones work well with tropical destinations.
Bonus Tip: Share your photobook draft with friends for feedback before sending it for printing. Outside perspectives can help spot overlooked details or ideas.
Conclusion
Crafting a travel photo book isn’t just about preserving photos; it’s about telling your personal travel story. Through careful photo selection, meaningful layouts, and creative integrations like mementos or QR codes, you can turn scattered travel memories into a timeless visual narrative.
If you’re ready to start your project, choose a platform like Mixbook or Canva and commit to telling your unique story. The result will be a tangible and interactive keepsake that allows you to relive cherished travels endlessly.
Call-to-Action
Get started today by organizing your travel photos and drafting your design. Need more tips? Visit our blog for articles like “10 Genius Photo Organization Tips” or “The Ultimate Guide to AI Photobook Design in 2025”. Transform your adventures into an heirloom today!